Budgeting can be challenging, especially if you are juggling a wide variety of expenses and more than one stream of income. Making sure that you have enough money to spend while ensuring that you save some can definitely be difficult.
Budgeting is even harder when you are going on a trip to a destination in which the cost of things is different than what you are used to. Because of differences in exchange values, it is easy to be confused about your budget.
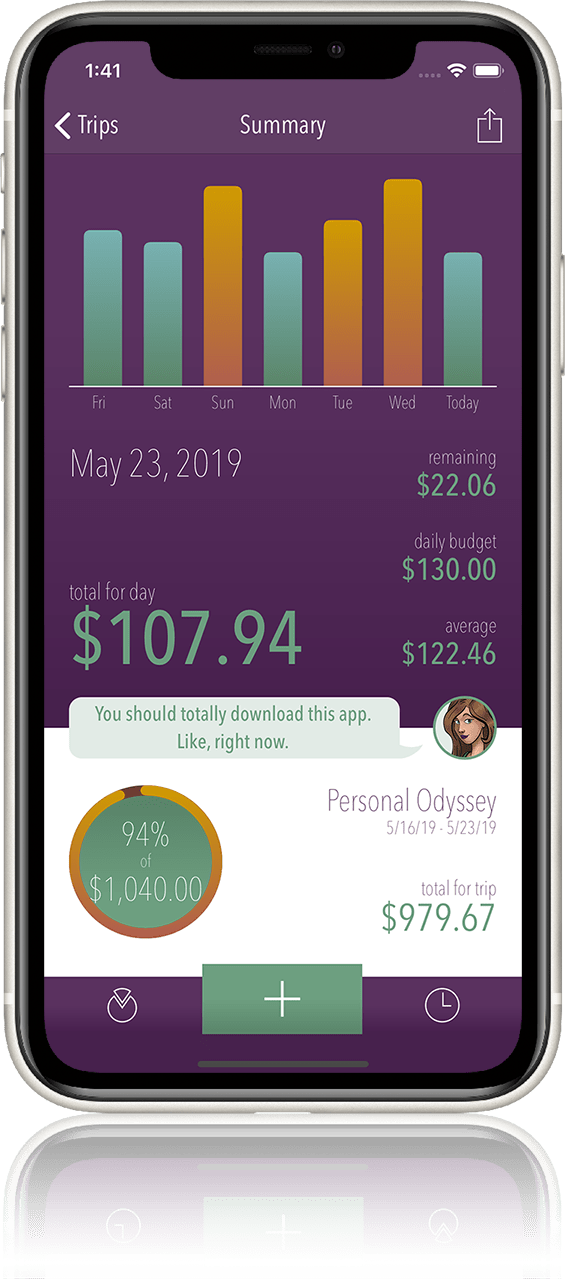
Therefore, you may wan to use Trail Wallet. This iOS app is designed to help travelers keep track of their money, making sure that they do not overspend or even underspend during the trip. Here’s what you need to know.

What Trail Wallet Offers
Before talking about how to use the app to budget and track your travel expenses, the first thing you need to know is its offerings. This way, you will have more familiarity with Trail Wallet before using it.
Set Daily Budgets
The main thing about Trail Wallet is that it lets you set your allotted amount for day-to-day spending during the trip.
Trail Wallet is a great way to make sure that your funds are well-distributed throughout your travels while guaranteeing that you do not go over your budget or scrimp when you have enough.
Record Expenses
To do this, the app lets you enter every item you spend your money on. You can also select the category of the transaction, whether it is for food, transportation or other expenses. Just be diligent in making entries and you are good to go.
Simple Analytics Of Your Spending
Knowing how much you spend is a good way to see how you can improve your habits. This applies whether you are traveling or not. Trail Wallet is equipped with a chart generation feature to help you.
A Simple Guide To Using Trail Wallet
So, now that you know what to expect from the app, you can now proceed with this brief guide without worries. Ready to learn how to use this app? Check out the step-by-step set of instructions below.
1. Download The App
The first thing you need to do is to download the application from the app store. Keep in mind that using it is free for the first 25 items.
However, if you want to use the application without restrictions, you will need to buy the paid version for $4.99.
2. Start Organizing Your Wallet
After installing Trail Wallet, the next thing you should do is to start the app. Then, create a wallet for the entire trip or for the month.
Make sure to set the currency you will be using. After this, designate an amount you are willing to spend for the day.
3. Add Items Every Time You Spend
Whenever you spend, see to it that you are adding it to your daily budget. You can take pictures of receipts and store it into your tracker.
You should also choose the right category for every transaction. To add items easily, use the Quick Add feature.
4. Check Your Remaining Budget
As you spend, Trail Wallet calculates how much money you have remaining. Make sure to check this from time-to-time.
This way, you are aware whether you are nearing your financial capacity for the day or you can splurge a little bit more on your local cuisine or other similar items.
5. Evaluate Your Spending
With the app’s built-in report generation feature, you can easily see where your money went. Trail Wallet’s interactive pie chart lets you visualize your spending per category during the day or for the entire trip.
This is a great way to know what you can change and how you can improve your spending in preparation for your future trips.

The Bottom Line
There is no need to make budgeting for your travels more complicated than it already is.
With the use of Trail Wallet, you can minimize the time you spend calculating your pocket money and maximize precious moments to enjoy the local culture and scenery.


