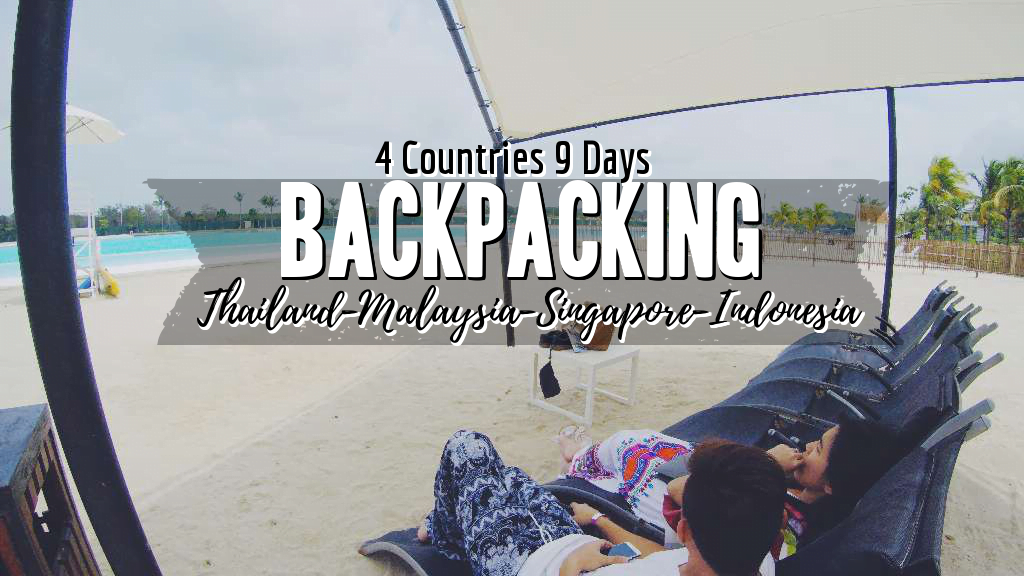
Asia is full of wonders! There’s just too much to do and we only have a limited time to do all of the things on our lists. We only had 9 days to squeeze everything in – without sacrificing too much of our budget – for Thailand-Malaysia-Singapore-Indonesia. This is a DIY travel itinerary. 🙂
Backpacking THAILAND – MALAYSIA – SINGAPORE – INDONESIA
A limitation of 30,000 Philippine pesos or roughly US$600 budget was set for this trip without compromising comfort, privacy, and food for the both of us. [Read: 5000 Pesos Challenge: Kuala Lumpur, Malaysia]
Check our facebook album (link) for other information. It has been shared by more than 7,000 people.
On this itinerary, I’ll show you how we made our 9 days of backpacking beautiful. We started in Thailand, then we head next to Malaysia via train, moved to Singapore via bus, and then sailed to Indonesia for a day trip and went back to Singapore, then to our homeland, Philippines, the most beautiful of all. [Read: Singapore for a Day]
First things first, (especially for Filipino travelers) make sure to renew your passport 6 months before it expires, else your travel plans will be invalidated. Go to the nearest DFA office to renew your passport. Book return tickets and accommodations prior to leaving the country for a higher chance of not getting off-loaded. We booked our hotels via Agoda (optional: Booking.com).
Immigration (F.A.Qs)
We’ve heard several horror stories about the immigration but don’t let it stop you from exploring. Frequently asked questions will most likely be:
a. How many days are you gonna be in –insert country here-?
-Be honest.
b. When are you coming back?
-Tell them your date of the flight back to Manila. So it’s better if you book flight tickets back early on.
c. Where are you going to stay once you’re there? backpacking
-Show them your accommodation documents. If staying with a friend, show them the address or the map.
d. Do you have a companion traveling with you?
-Girlfriend, boyfriend, best friend, relatives, etc.
e. What’s your job/business? How many years have you been working in the company?
-Just tell them the truth. Office jobs are more likely to be accepted instantly. Freelancers, however, are being questioned more. Tell them everything they need to know especially if it’s your first out of the country trip and just be confident in answering the questions.
PS: I am a freelancer. I was only asked 3 questions because the officer saw my Japan visa.
People who had passport stamps before gets easier interviews in the immigration.
Whatever your reason for leaving the country, just put a smile and be confident every time. Some officers would really ask you questions pertaining to what type of work you do, how much money do you have, can you support yourself outside the country, etc, because they need to know if you’re going back to your home country.
Backpacking Trip Expenses
Flight Tickets (RT, 2 people): (in Pesos | via Cebu Pacific promo fare)
⋅ MNL (Manila) – BKK (Bangkok) (one way) : ₱1,494.88
⋅ SIN (Singapore) – MNL (Manila)(one way) : ₱3,680.55
Philippine Travel Tax: 1620 each x 2 = ₱3,240.00
Hotels and accommodations: (in Php)
Thailand – L.A. Tower Hotel for 2 nights + taxes: ₱1,849.00 – link to review
Malaysia – Hotel Excel Inn for 1 night: 600.00 (54 MYR)
& Backpackers Travelers Inn for 2 nights: ₱1,394.92 – link to review
Singapore – Amrise Hotel for 2 nights: ₱3,240.00
Check via AGODA or BOOKING for other cheaper or best option for your stay.
Ferry from SG to Indonesia for 2: 88 SGD (₱3,078.74 – for two pax RT)
For ferry schedule and rates, here’s the link.
Watch our short video covering Thailand and Malaysia.

Backpacking Itinerary Details
Day 1 | Thailand
10:00 pm: Departed from NAIA Terminal 3 (GMT + 8)
12:30 am: Arrival at Suvarnabhumi Airport (BKK) (GMT + 7)
Since there are no trains and only taxis are available at these off hours – we decided to stay in the airport until morning.
Thailand 4G Sim: 49 Baht backpacking
6:00 am: Went to Super Rich Money Changer to exchange Peso to Baht – located on the ground floor of the airport
P.S.: You don’t have to exchange your PHP to USD. You can exchange PHP to THB directly. You would lose less money that way instead of PHP to USD to THB.
7:00 am: Train to Phaya Thai station (45 baht each x2)
8:00 am – 2:00 pm: mostly by walking – with our bags strapped on
Democracy Monument
Loha Prasat
Wat Benchamabophit (Marble Temple)
Wat Sunthorn
Wat Saket (20 Baht each x 2)
Wat Ratcha Natdaram Worawihan
Xuantianshangdi Temple
Grand Palace
Wat Phra Kaew
Wat Ratchapradit
City Pillar Shrine Lak Muang
3:00 pm:
Tuktuk ride to Hua Lamphong Station (100 Baht x 2)
Hua Lamphong to Sutthisan station (39 Baht x 2)
Walk and check in to L.A. Tower Hotel
Sutthisan Station to Hua Lamphong: (39 Baht)
Hua Lamphong to Sutthisan: (39 Baht)
Check here for other cheaper choices for Bangkok via AGODA or BOOKING
I found out I lost my GoPro with me when we were in the station on the way to Sutthisan. So I went back to Hua Lamphong to check if I left it somewhere there. I’ve gone through all the stops we had and found nothing. Luckily, it was at the ticket counter and they gave it back to me! Apparently, I left it after inquiring about our possible tickets to Padang Besar for Malaysia. Thank goodness!
7:30 pm – 10:00 pm: We had a dinner courtesy of Mexicano Restaurante Authentico – sumptuous meals here! You should try this! Don’t forget to reserve your seats for dinner!
Sutthisan Station to Sukhumvit (25 Bhat x2)
Sukhumvit to Sutthisan: (25 Baht x2)
11:00 PM: Back to hotel
Day 2 | Thailand
11:00 am – 5:00 pm:
Sutthisan to Hua Lamphong (38 Baht each x2)
Metered taxi to Wat Arun from Hua Lamphong (105 Baht)
Wat Pho (100 Baht each x2)
Wat Arun (50 Baht each x 2)
Chao Phraya River Ferry river crossing (4 Baht each x 4) – we had it twice
6:00 pm:
Metered Taxi to Hua Lamphong from Wat Pho (65 Baht)
Hua Lamphong to Sutthisan (39 baht each x2)
7:00 pm: Back at the hotel for swimming
9:00 pm – 11:00 pm:
Sutthisan to Hua Lamphong (78 Baht x2)
Metered taxi from Hua Lamphong to Khao San Road (65 Baht)
Taxi to Hua Lamphong (60 Baht)
Hua Lamphong to Sutthisan (39 baht x2)
11:00 pm: Back at the hotel
Day 3 | Thailand – Malaysia
9:00 am – 11:30 am:
Sutthisan to Chatuchak (23 Baht x2)
Chatuchak Market
Chatuchak Park
11:30 am – 12:00 pm:
Chatuchak to Sutthisan (23 Baht x2)
Check out at L.A. Tower Hotel
12:00pm – 3:00 pm: backpacking
Sutthisan to Hua Lamphong (39 Baht each x2)
Booked tickets to Padang Besar Upper and Lower berth (1930 Baht)
3:10 pm onwards: Departure of sleeper train to Padang Besar, Malaysia
PS: The sleeper train is so comfortable and the whole trip was just like staycationing. 😉
Please read the article about crossing borders from Thailand (Bangkok) to Malaysia (Kuala Lumpur)
BOOK YOUR TRAIN TICKETS HERE:
Hua Lamphong to Padang Besar
Padang Besar to KL Sentral
Day 4 | Malaysia
9:00 am (GMT + 8): Arrival of the train in Padang Besar station, Malaysia
9:00 am – 12:20 pm: Malaysia Immigration + Eat + Money exchange outside the station
Malaysian Sim Card: 8.50 MYR
12:25 pm: Departure of KTM train from Padang Besar to Butterworth (11.40 MYR x2)
2:20 pm: Arrival of KTM train in Butterworth from Padang Besar
3:00 pm: Departure of the bus from Butterworth to Kuala Lumpur (45 MYR each x2)
9:00 pm: Arrival at TBS, Kuala Lumpur
Booked a ticket to Johor Bahru from TBS for the 31st (35 MYR each x2)
10:00 pm: Departure of Bus 690 from TBS to Pudu Sentral near Chinatown (2 MYR each x2)
10:20 pm: Arrival to Pudu Sentral
10:30 pm: Check in at hotel (but they were overbooked so we had to find another hotel for the night)
11:00 pm: Check-in at Hotel Excel Inn (walk-in) (54 MYR)
I advise you to book earlier as possible to avoid issues like what we had.
Check AGODA or BOOKING and book early.
BOOK YOUR TRAIN TICKETS HERE:
Padang Besar to KL Sentral
Day 5 | Malaysia backpacking
8:00 am: Katsuri Walk
9:00 am – 11:00 am:
Train from Kuala Lumpur station to Batu Caves (2.5 MYR each x2)
Batu Caves to Kuala Lumpur station (2.5 MYR each x2)
Walk back to Hotel Excel Inn
12:00 pm: Check out at hotel
12:30 pm: Check in at Backpackers Travelers Inn, Chinatown
Explored some parts of Kuala Lumpur nearby Chinatown
6:00 pm – 11:00pm:
Train from Pasar Seni to KLCC station (2.10 MYR x2)
Went to KLCC
Petronas Towers
Suria KLCC
KLCC Park
Menara KL (KL Tower)
Bukit Bintang
Walked back to Chinatown from Bukit Bintang
11:00 pm: Back at Backpackers Travellers Inn
Visit AGODA or BOOKING for other options and book early.
Day 6 | Malaysia
11:00 am – 8:00 pm: (all by walking)
Merdeka Square (Dataran Merdeka)
KL City Gallery
Textile Museum
Botanical Garden backpacking
Lake Gardens
Bamboo Playhouse
Amphitheater, Lake Gardens
It rained hard by the afternoon so we just sat around at the Bamboo Playhouse and waited for the rain to stop.
9:00 pm: Back at the hotel and went to Chinatown to look for goods (pasalubong)
Day 7 | Malaysia – Singapore
9:00 am – 11:30 am:
Walked to Lake Gardens
Planetarium Negara
Stonehenge Replica
Chinatown shopping
12:00 pm: Check out from Backpackers Travelers Inn
1:00 pm: Bus 960 from Pudu Sentral to TBS (2.5 MYR each x2)
2:10 pm: Departure of bus from TBS to Johor Bahru (JB Larkin terminal) (stated above 35 MYR each x2)
7:20 pm: Arrival of the bus in Johor Bahru (JB Larkin terminal) from TBS (traffic!)
7:40 pm: Departure of Bus 170 heading to Queen Street, Singapore (2.5 MYR each x2)
Please read the article about crossing borders from Malaysia to Singapore
8:00 pm- 9:30 pm: Singapore Immigration
10:00 pm – 12:00 am:
Drop off at Sixth Avenue station
MRT from Sixth Avenue to Bugis (1.90 SGD each x2)
Bugis to Aljunied (1.60 SGD each x2)
10 mins walk to Amrise Hotel
Check in at Amrise Hotel
Hotels and hostels in Singapore are particularly pricey so make further research.
Visit AGODA or BOOKING and book early.
BOOK YOUR TRAIN/BUS TICKETS HERE:
TBS Kuala Lumpur to Johor Bahru (JB Larkin Terminal)
JB Larkin Terminal, Malaysia to Queen Street, Singapore
Day 8 | Singapore – Indonesia
This was the day we’re booked for Indonesia (Day Tour to another country)
Please read the article about crossing borders from Singapore to Indonesia
7:30 am – 9:00 am:
Aljunied Station to Tanah Merah MRT station (1.70 SGD and 1.90 SGD) because one of us lost a card
Taxi from Tanah Merah Station to Tanah Merah Ferry Terminal (12.50 SGD)
Check in, Immigration
9:10 am: Departure of ferry to Bintan, Indonesia
10:10 am: Arrival of ferry at Bintan, Indonesia backpacking
There’s a Money Changer at the Bintan Terminal, we exchanged SG$50 = 440,000 IDR
10:30 am – 7:00 pm:
Treasure Bay (Entrance Fee: 100,000 IDR each x2)
The Canopi
Lagoi Bay (Lagoi Beach)
Lagoi Plaza
7:00 pm: Check in at Bandar Bentan Talani (terminal), Immigration, etc
8:10 pm: Departure of Ferry to Singapore
9:10 pm: Arrival of Ferry from Bandar Bentan Talani to Tanah Merah Ferry Terminal, Singapore
Taxi to from Tanah Merah Ferry Terminal to Tanah Merah MRT (8.90 SGD)
Tanah Merah MRT to Aljunied (1.80 SGD each x2)
10:00 pm: Back in hotel
Indonesia Day tour itinerary here. backpacking
If you need to stay longer in Indonesia, check hotels via these links – AGODA | BOOKING
BOOK YOUR FERRY TICKETS HERE:
Tanah Merah Ferry Terminal to Bintan
Day 9 | Singapore
8:00 am: Early check out from Amrise Hotel
Aljunied to Changi Aiport (2.10 SGD + 2.20 SGD)
8:30 am: Left Baggage at Changi Airport (6.40 SGD x 2 bags)
9:00 am – 5:00 pm:
Marina Bay
Marina Bay Gardens
Lotus Park
Merlion Park
Esplanade by the Bay
Vivo City
Bugis Junction for shopping (cheap goods)
Sentosa (Day Pass) (8 SGD each)
-Palawan Beach
-Siloso Beach
-Tanjung Beach
-Merlion Sentosa backpacking
-Universal Studios
-Madame Tussauds
-Others
[Singapore Itinerary – Where we went]
—Changi to Marina Bay (2.30 + 2.40 SGD)
—Esplanade to Harbour Front (Sentosa)
—Harbour Front to Bugis (1.70 + 1.80 SGD)
—Bugis to Changi airport (2.30 + 2.40 SGD)
5:15 pm: Check in at Changi Airport
6:50 pm onwards: Departure of the plane from SG to Manila
10:30 pm: Arrival in Manila
IMPORTANT NOTES:
1. Taxi prices may vary according to the traffic situation, location, and other several factors. Taxi in Thailand was relatively cheap. Taxi in Singapore was very expensive, as much as possible avoid taking a taxi.
2. I only included the entrance fees and commute expenses, food depends on how much you want to consume.
3. If there is no price indicated, that means it was FREE.
4. Yes, I took note of all our expenses for the whole trip – because we have a fixed budget.
5. This is not a packaged tour. It was our itinerary based on our experience.
6. If you’re a couple (like us), book a private room. If you’re in groups, book a dorm room (price per bed, thus, cheaper).
7. If you have any questions, feel free to ask. Don’t forget to like and follow our page! backpacking
WHAT TO READ NEXT
4D3N South Cebu Itinerary
How I Spent Only 21000 pesos in Japan
Going to Boracay via Ferry
5000 Peso Challenge: Kuala Lumpur, Malaysia
BRUNEI Itinerary for 3 Days | Brunei Travel Guide


Comments are closed.